
An image of the linear alphabet isn’t going to do us much good so we need to split it down into individual letters.
Splitting Into Individual Letters:
To split this long image of the alphabet into individual characters I created a ‘bash'(linux) script. It uses the Image-Magick ‘convert’ program to do two things. First convert will compress the MxN image into a Mx1 (single pixel column) image and then report on the colors of the pixels in this image. The characters will be non-empty and the space around them will be empty (Color #00000000 RGBA). We just use the transition from one to the other to determine where the vertical extents of all the letters are and then use ‘convert’ to strip the excess non-character stuff off the top and bottom of the original image.
Then we do the same, compress the vertical dimension and strip out the characters from the trimmed image above. The individual characters are then saved in a directory by the name of the Alphabet strip image.
Here is the chopimage script that I use:
[cc lang=”bash” tab_size=”8″ lines=”20″ width=”600″] #!/bin/bash # # Script file to chop an image of a string of characters into individual letters # based on the uniform transparent background colour (=#00000000 none) between the letters. # # This script performs by taking the image and first using ‘convert’ to smoosh (a technical term) # it down to a vertical image 1 pixel wide, then reporting on each of the pixels. An AWK command # is used to look for a transition from ‘none’,or ‘graya(0,0)'(the background) to something # that isn’t ‘none’ or ‘graya(0,0)’: # # … # 0,4: (0,0,0,0) #00000000 none # 0,5: (0,0,0,0) #00000000 none # 0,6: (0,0,0,0) #00000000 none # 0,7: (0,0,0,0) #00000000 none # 0,8: (3.63098e-09,1.45239e-08,0,5.62604e-15) #00000000 srgba(0,0,0,8.58478e-20) # 0,9: (16191,64764,0,0.469211) #3FFC0000 srgba(63,252,0,7.15971e-06) # 0,10: (16191,64764,0,9.36611) #3FFC0000 srgba(63,252,0,0.000142918) # 0,11: (16191,64764,0,35.3837) #3FFC0000 srgba(63,252,0,0.000539921) # 0,12: (16191,64764,0,96.4829) #3FFC0000 srgba(63,252,0,0.00147223) # … # Or # … # 41,0: (0,0) #00000000 graya(0,0) # 42,0: (0,0) #00000000 graya(0,0) # 43,0: (0,0) #00000000 graya(0,0) # 44,0: (0,0) #00000000 graya(0,0) # 45,0: (0,0) #00000000 graya(0,0) # 46,0: (2.8607e-05,1.72444e-13) #00000000 graya(0,2.63133e-18) # 47,0: (49575.3,21.5728) #C1C1C100 graya(193,0.000329179) # 48,0: (49937.1,429.378) #C2C2C202 graya(194,0.00655189) # 49,0: (51556.9,1516.96) #C9C9C906 graya(201,0.0231474) # … # # Awk then reports the line numbers which we use to determine where to cut the image (to get # rid of most of the background. We again do this with ‘convert’ # # Next we do the same thing, smooshing the image down to a 1-pixel high image and using the # resulting list (like above — except for columns instead of rows) to tell us were to cut # the letters out. We store these in a directory with the file name of the original image. # # The reported transitions from the background (‘none’) to otherwise is why we need expand the # image in GIMP to make sure there is a boundary of blank space around the images (it will get # trimmed off anyway). # # See article: # https://stackoverflow.com/questions/33636849/imagemagick-split-image-by-background-color # # USAGE: # chopimageJust run the program with the image name and if you want a different width for your space character (default=50 pixels) then specify this too. My PNG file was called GradientBevel.png, I wanted 40pixel wide spaces and I wanted the output image files to be named “LetterImage_%03d.png” so my command was:
chopimage GradientBevel.png “LetterImage_%03d.png” 40
This produced the following output:
[cc lang=”text” tab_size=”8″ lines=”20″ width=”600″] alan@Midnight$ chopimage GradientBevel.png “LetterImage_%03d.png” 40 cmpimg=’GradientBevel.png’ fmt=’LetterImage_%03d.png’ blank=’40’ dirnam=’GradientBevel’ imgsz=’1453,103′ Finding top/bottom empty space Getting y1,y2 y1=’27’ y2=’89’ Trimming top and bottom Finding inter-letter spacing ————————– line1=’16,0: (65535,65535,65535,0.98363) #FFFFFF00 srgba(255,255,255,1.50092e-05)’ line2=’70,0: (1.61668e-09,1.61668e-09,1.61668e-09,1.85662e-15) #00000000 srgba(0,0,0,2.83302e-20)’ x1,x2=’16,70′ Producing character: LetterImage_001.png ————————– line1=’76,0: (65535,65535,65535,17.1694) #FFFFFF00 srgba(255,255,255,0.000261989)’ line2=’122,0: (2.10696e-08,2.10696e-08,2.10696e-08,1.41067e-14) #00000000 srgba(0,0,0,2.15254e-19)’ x1,x2=’76,122′ Producing character: LetterImage_002.png ————————– line1=’129,0: (65535,65535,65535,4.98295) #FFFFFF00 srgba(255,255,255,7.60349e-05)’ line2=’176,0: (4.59765e-08,4.59765e-08,4.59765e-08,3.01553e-14) #00000000 srgba(0,0,0,4.6014e-19)’ x1,x2=’129,176′ Producing character: LetterImage_003.png ————————– line1=’185,0: (65535,65535,65535,17.1694) #FFFFFF00 srgba(255,255,255,0.000261989)’ line2=’235,0: (4.08064e-08,4.08064e-08,4.08064e-08,2.64424e-14) #00000000 srgba(0,0,0,4.03485e-19)’ x1,x2=’185,235′ Producing character: LetterImage_004.png ————————– line1=’244,0: (65535,65535,65535,17.1694) #FFFFFF00 srgba(255,255,255,0.000261989)’ line2=’286,0: (1.99955e-08,1.99955e-08,1.99955e-08,-1.33887e-14) #00000000 srgba(0,0,0,-2.04299e-19)’ x1,x2=’244,286′ Producing character: LetterImage_005.png ————————– line1=’295,0: (65535,65535,65535,17.1694) #FFFFFF00 srgba(255,255,255,0.000261989)’ line2=’336,0: (1.86687e-08,1.86687e-08,1.86687e-08,-1.25011e-14) #00000000 srgba(0,0,0,-1.90755e-19)’ x1,x2=’295,336′ Producing character: LetterImage_006.png ————————– line1=’344,0: (65535,65535,65535,4.98295) #FFFFFF00 srgba(255,255,255,7.60349e-05)’ line2=’395,0: (5.95701e-08,5.95701e-08,5.95701e-08,-3.61643e-14) #00000000 srgba(0,0,0,-5.51831e-19)’ x1,x2=’344,395′ Producing character: LetterImage_007.png ————————– line1=’404,0: (65535,65535,65535,17.1694) #FFFFFF00 srgba(255,255,255,0.000261989)’ line2=’453,0: (1.19024e-07,1.19024e-07,1.19024e-07,-7.01002e-14) #00000000 srgba(0,0,0,-1.06966e-18)’ x1,x2=’404,453′ Producing character: LetterImage_008.png ————————– line1=’463,0: (65535,65535,65535,17.1694) #FFFFFF00 srgba(255,255,255,0.000261989)’ line2=’488,0: (1.19024e-07,1.19024e-07,1.19024e-07,-7.01002e-14) #00000000 srgba(0,0,0,-1.06966e-18)’ x1,x2=’463,488′ Producing character: LetterImage_009.png ————————– line1=’492,0: (65535,65535,65535,3.12778) #FFFFFF00 srgba(255,255,255,4.77269e-05)’ line2=’524,0: (1.28439e-07,1.28439e-07,1.28439e-07,-7.54638e-14) #00000000 srgba(0,0,0,-1.1515e-18)’ x1,x2=’492,524′ Producing character: LetterImage_010.png ————————– line1=’535,0: (65535,65535,65535,17.1694) #FFFFFF00 srgba(255,255,255,0.000261989)’ line2=’587,0: (1.61668e-09,1.61668e-09,1.61668e-09,-1.85662e-15) #00000000 srgba(0,0,0,-2.83302e-20)’ x1,x2=’535,587′ Producing character: LetterImage_011.png ————————– line1=’591,0: (65535,65535,65535,17.1694) #FFFFFF00 srgba(255,255,255,0.000261989)’ line2=’633,0: (1.99955e-08,1.99955e-08,1.99955e-08,-1.33887e-14) #00000000 srgba(0,0,0,-2.04299e-19)’ x1,x2=’591,633′ Producing character: LetterImage_012.png ————————– line1=’640,0: (65535,65535,65535,17.1694) #FFFFFF00 srgba(255,255,255,0.000261989)’ line2=’697,0: (1.19024e-07,1.19024e-07,1.19024e-07,-7.01002e-14) #00000000 srgba(0,0,0,-1.06966e-18)’ x1,x2=’640,697′ Producing character: LetterImage_013.png ————————– line1=’707,0: (65535,65535,65535,17.1694) #FFFFFF00 srgba(255,255,255,0.000261989)’ line2=’756,0: (1.19024e-07,1.19024e-07,1.19024e-07,-7.01002e-14) #00000000 srgba(0,0,0,-1.06966e-18)’ x1,x2=’707,756′ Producing character: LetterImage_014.png ————————– line1=’764,0: (65535,65535,65535,4.98295) #FFFFFF00 srgba(255,255,255,7.60349e-05)’ line2=’817,0: (4.78058e-08,4.78058e-08,4.78058e-08,-3.04409e-14) #00000000 srgba(0,0,0,-4.64499e-19)’ x1,x2=’764,817′ Producing character: LetterImage_015.png ————————– line1=’826,0: (65535,65535,65535,17.1694) #FFFFFF00 srgba(255,255,255,0.000261989)’ line2=’872,0: (2.50286e-08,2.50286e-08,2.50286e-08,-1.68538e-14) #00000000 srgba(0,0,0,-2.57173e-19)’ x1,x2=’826,872′ Producing character: LetterImage_016.png ————————– line1=’878,0: (65535,65535,65535,4.98295) #FFFFFF00 srgba(255,255,255,7.60349e-05)’ line2=’931,0: (4.78058e-08,4.78058e-08,4.78058e-08,-3.04409e-14) #00000000 srgba(0,0,0,-4.64499e-19)’ x1,x2=’878,931′ Producing character: LetterImage_017.png ————————– line1=’940,0: (65535,65535,65535,17.1694) #FFFFFF00 srgba(255,255,255,0.000261989)’ line2=’989,0: (1.61668e-09,1.61668e-09,1.61668e-09,-1.85662e-15) #00000000 srgba(0,0,0,-2.83302e-20)’ x1,x2=’940,989′ Producing character: LetterImage_018.png ————————– line1=’995,0: (65535,65535,65535,7.3013) #FFFFFF00 srgba(255,255,255,0.000111411)’ line2=’1040,0: (7.78376e-08,7.78376e-08,7.78376e-08,-2.84178e-14) #00000000 srgba(0,0,0,-4.33628e-19)’ x1,x2=’995,1040′ Producing character: LetterImage_019.png ————————– line1=’1045,0: (65535,65535,65535,2.85368) #FFFFFF00 srgba(255,255,255,4.35443e-05)’ line2=’1094,0: (7.46746e-08,7.46746e-08,7.46746e-08,-2.50023e-14) #00000000 srgba(0,0,0,-3.8151e-19)’ x1,x2=’1045,1094′ Producing character: LetterImage_020.png ————————– line1=’1100,0: (65535,65535,65535,12.1229) #FFFFFF00 srgba(255,255,255,0.000184983)’ line2=’1147,0: (3.82292e-07,3.82292e-07,3.82292e-07,-1.13423e-13) #00000000 srgba(0,0,0,-1.73072e-18)’ x1,x2=’1100,1147′ Producing character: LetterImage_021.png ————————– line1=’1154,0: (65535,65535,65535,0.772458) #FFFFFF00 srgba(255,255,255,1.17869e-05)’ line2=’1208,0: (5.96768e-09,5.96768e-09,5.96768e-09,-3.42669e-15) #00000000 srgba(0,0,0,-5.2288e-20)’ x1,x2=’1154,1208′ Producing character: LetterImage_022.png ————————– line1=’1211,0: (65535,65535,65535,0.772458) #FFFFFF00 srgba(255,255,255,1.17869e-05)’ line2=’1279,0: (2.72452e-08,2.72452e-08,2.72452e-08,-1.21862e-14) #00000000 srgba(0,0,0,-1.8595e-19)’ x1,x2=’1211,1279′ Producing character: LetterImage_023.png ————————– line1=’1283,0: (65535,65535,65535,0.98363) #FFFFFF00 srgba(255,255,255,1.50092e-05)’ line2=’1335,0: (6.46671e-09,6.46671e-09,6.46671e-09,-3.71324e-15) #00000000 srgba(0,0,0,-5.66605e-20)’ x1,x2=’1283,1335′ Producing character: LetterImage_024.png ————————– line1=’1338,0: (65535,65535,65535,2.69423) #FFFFFF00 srgba(255,255,255,4.11113e-05)’ line2=’1390,0: (5.96768e-09,5.96768e-09,5.96768e-09,-3.42669e-15) #00000000 srgba(0,0,0,-5.2288e-20)’ x1,x2=’1338,1390′ Producing character: LetterImage_025.png ————————– line1=’1393,0: (65535,65535,65535,6.36067) #FFFFFF00 srgba(255,255,255,9.70577e-05)’ line2=’1440,0: (1.41726e-07,1.41726e-07,1.41726e-07,-4.80423e-14) #00000000 srgba(0,0,0,-7.33078e-19)’ x1,x2=’1393,1440′ Producing character: LetterImage_026.png [/cc]This left me with a directory full of letter images. Note: if some of your letters are packed together into one image increase the spacing between these letters in the alphabet string above and redo all the intervening work. These are the letter images in one of my font directories:
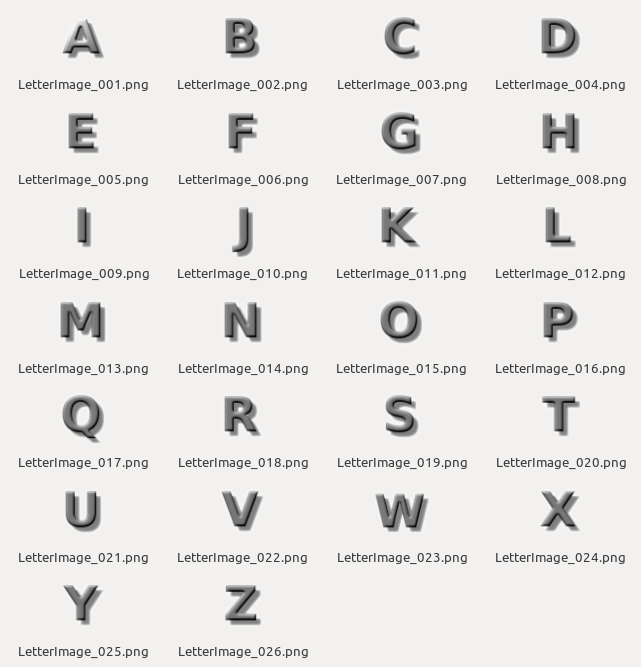
You may notice looking at your individual character files that there seems to be a lot of space surrounding certain letters. This may be due to an included underscore (or some similar character) that forces a vertical trimming that isn’t optimal for all characters. However, this will make it easier to position the characters in Cocos2d-x.
Problems:
I’ve tripped across a few problems. Here are their solution/explanations:
- Whitespace on individual letters seems excessive. This may be due to one or more characters in the alphabet extending beyond the average characters boundaries. For instance I found an underscore ‘_’ character cause all my letters to have excess white-space at the bottom. Eventually I’ll make my PList->Fnt translation program smart enough to adjust the position of the letters based on their actual extent … but until then.
- Multiple letters in individual letter files. This is due to two sequential letters coming too close together in the image (because of glow/drop-shadow or kerning) and can be solved by putting more blanks between characters in the alphabet string.
- No results at all. I’ve found this is because there is not enough color #00000000 (empty) boundary around the letters. In gimp just increase the canvas size (and center the image) and this should fix the problem.
Next:
OK, now that we’ve split them all apart we have to put them all back together into a sprite sheet.