

In this post I’ll take you through the process of producing a gold colored font similar to what I’ve used in my own apps.
First the alphabet:
We need a string of characters separated by one or more spaces (I used 4 in the example below to properly separate the characters) to use in Gimp to create the font string.
A B C D E F G H I J K L M N O P Q R S T U V W X Y Z
As in my other post I’ll just create a truncated alphabet for simplicity.
Using Gimp to create an alphabet image:
Open up Gimp and create a blank image of size 500 x 20,000. You might have to experiment here to get an image large enough for your complete alphabet. MENU/File/New… and set the image size and press OK.
Now we need to color the background black using the Bucket-Fill tool from the Gimp toolbox.
Next, switch the Gimp Foreground/Background colors around so we get white as the foreground color (use the curved double arrow near the black/white color boxes on the Gimp toolbox.
Select the ‘Text’ tool from the Gimp toolbox and choose the font you want to use, font size etc. I chose ‘Tiranti Solid LET’ 200 pixels for this example. I turned on Bold to give the character strokes some width. Finally I flattened the image (MENU/Image/Flatten Image).
This is approximately what you should have now (I’ve adjusted the image size for this post):

Create the bump-map:
Next we blur the letters slightly (MENU/Filters/Blur/Gaussian Blur, size=5). This will help to give the letters a 3D shape later.
Now we want to create a bump-map for the letters to generate a 3D shape: MENU/Select/By Colour, now click on the black background. MENU/Select/Invert
Go to the Layers dialog (MENU/Windows/Dockable-Dialogs/Layers) click on the “Create a new layer” button at the bottom left, select Transparency, name the layer bump-map and click OK. Next click the eye-symbol on the Background layer to hide it.
Select BlendTool on the Gimp toolbox (square with L-R black to white gradient) and set, Mode:Normal, Opacity:100%, Gradient: FG to BG (RGB), Shape: Linear. Now drag out the line from the very top of the image to the very bottom in a completely vertical line. If you don’t make the line vertical the gradient will be tilted. Your letters will now have a gradient from top to bottom.
Get rid of the select (MENU/Select/None), and apply the bump-map (MENU/Filters/Map/Bump Map). In the dialog set Bump Map:background image, Map Type: Sinusoidal (this is nice), and then press OK. Your lettering should appear 3D.
Make Letters Metalic:
Next we want to make the letters appear shiny like they were made from metal (MENU/Colors/Curves…). Pull out the curves so they look something like:
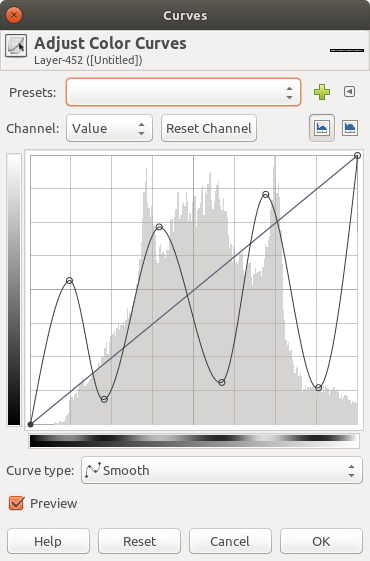
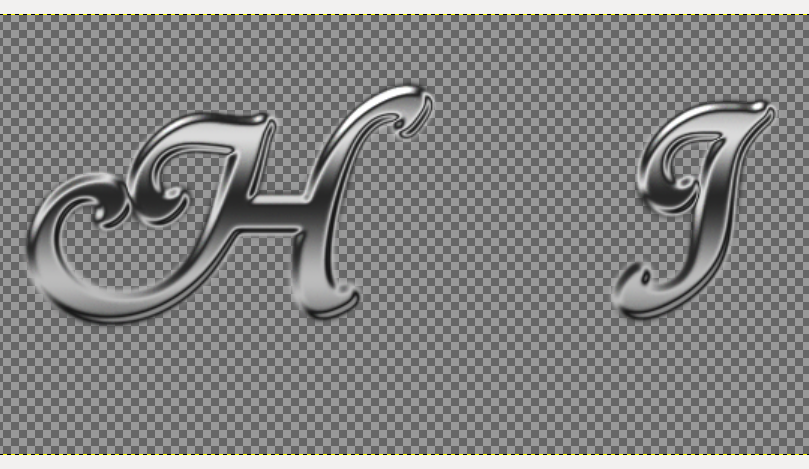
You can save this curve by clicking on the green+. Press OK. The lettering should appear much like the following (if you zoom in — use mouse wheel):
Apply the Gold Color:
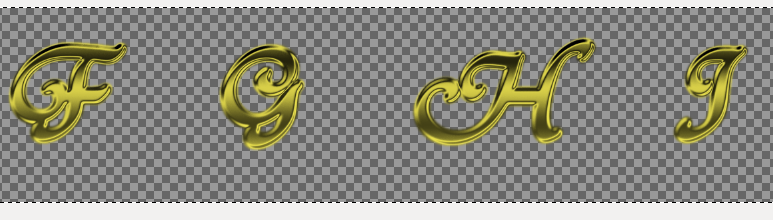
First we need to set a fore-ground color. Click on the foreground color blot(white block on Gimp toolbox) and set a yellow color: fff556 and press OK. In the Layers dialog make sure the visible layer (letters) is selected and apply that color to the image (MENU/Colors/Map/Gradient Map). This gives the object a nice gold color. NOTE: You can choose other colors and produce metallic lettering to suit your needs.
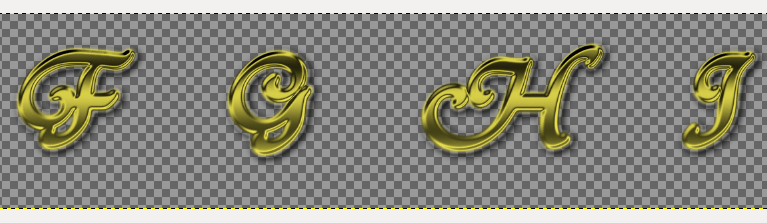
A drop-shadow can now be added. Select the letters as we did above (MENU/Select/By Color, now click on the black background. MENU/Select/Invert) and generate a drop-shadow (MENU/Filters/Light and Shadow/Drop Shadow, Opacity: 85%) and press OK. Un-select the characters (Shift-Ctrl-A). This gives each character a nice drop shadow something like the following:
We can now delete the background layer (the red circle with cross in Gimp layers dialog), merge the visible layers (MENU/Image/Merge Visible Layers) and Save (Ctrl-S) and Export (Ctrl-E, uncheck the “Save Background Color” checkbox and save as PNG file) our work.

Next:
Next we have to take our linear alphabet image, that we just created, and split each letter out into individual images.